Configure AWS PrivateLink for Redshift
The PrivateLink feature is available on the following dbt Cloud Enterprise tiers:
- Business Critical
- Virtual Private
To learn more about these tiers, contact us at sales@getdbt.com.
AWS provides two different ways to create a PrivateLink VPC endpoint for a Redshift cluster that is running in another VPC:
dbt Cloud supports both types of endpoints, but there are a number of considerations to take into account when deciding which endpoint type to use. Redshift-managed provides a far simpler setup with no additional cost, which might make it the preferred option for many, but may not be an option in all environments. Based on these criteria, you will need to determine which is the right type for your system. Follow the instructions from the section below that corresponds to your chosen endpoint type.
While Redshift Serverless does support Redshift-managed type VPC endpoints, this functionality is not currently available across AWS accounts. Due to this limitation, an Interface-type VPC endpoint service must be used for Redshift Serverless cluster PrivateLink connectivity from dbt Cloud.
Configuring Redshift-managed PrivateLink
- On the running Redshift cluster, select the Properties tab.
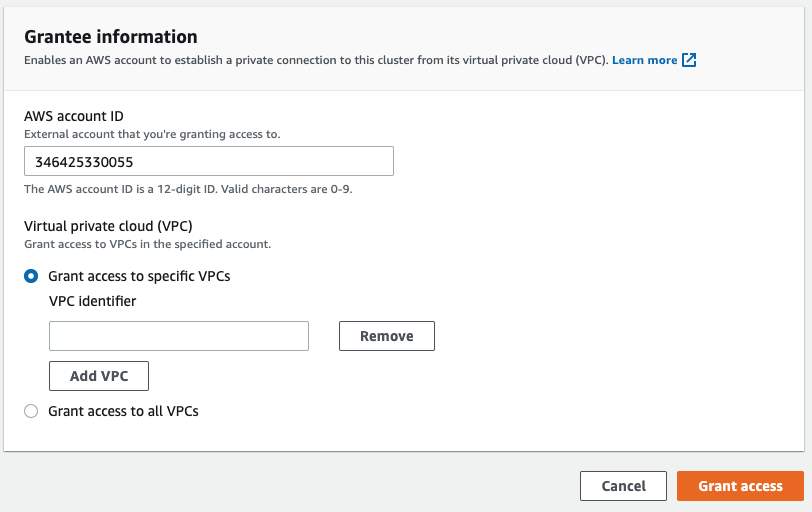
- In the Granted accounts section, click Grant access.
-
Enter the AWS account ID:
346425330055- NOTE: This account ID only applies to dbt Cloud Multi-Tenant environments. For Virtual Private/Single-Tenant account IDs please contact Support. -
Choose Grant access to all VPCs —or— (optional) contact Support for the appropriate regional VPC ID to designate in the Grant access to specific VPCs field.
- Add the required information to the following template, and submit your request to dbt Support:
Subject: New Multi-Tenant PrivateLink Request
- Type: Redshift-managed
- Redshift cluster name:
- Redshift cluster AWS account ID:
- Redshift cluster AWS Region (e.g., us-east-1, eu-west-2):
- dbt Cloud multi-tenant environment (US, EMEA, AU):
dbt Labs will work on your behalf to complete the PrivateLink setup. Please allow 3-5 business days for this process to complete. Support will contact you when the endpoint is available.
Configuring Redshift Interface-type PrivateLink
1. Provision AWS Resources
Creating an Interface VPC PrivateLink connection requires creating multiple AWS resources in the account containing the Redshift cluster:
-
Security Group — If you are connecting to an existing Redshift cluster, this likely already exists, however, you may need to add or modify Security Group rules to accept traffic from the Network Load Balancer (NLB) created for this Endpoint Service.
-
Target Group — The Target Group will be attached to the NLB to tell it where to route requests. There are various target types available for NLB Target Groups, but you will use the IP address type.
-
Target Type: IP
-
Standard Redshift
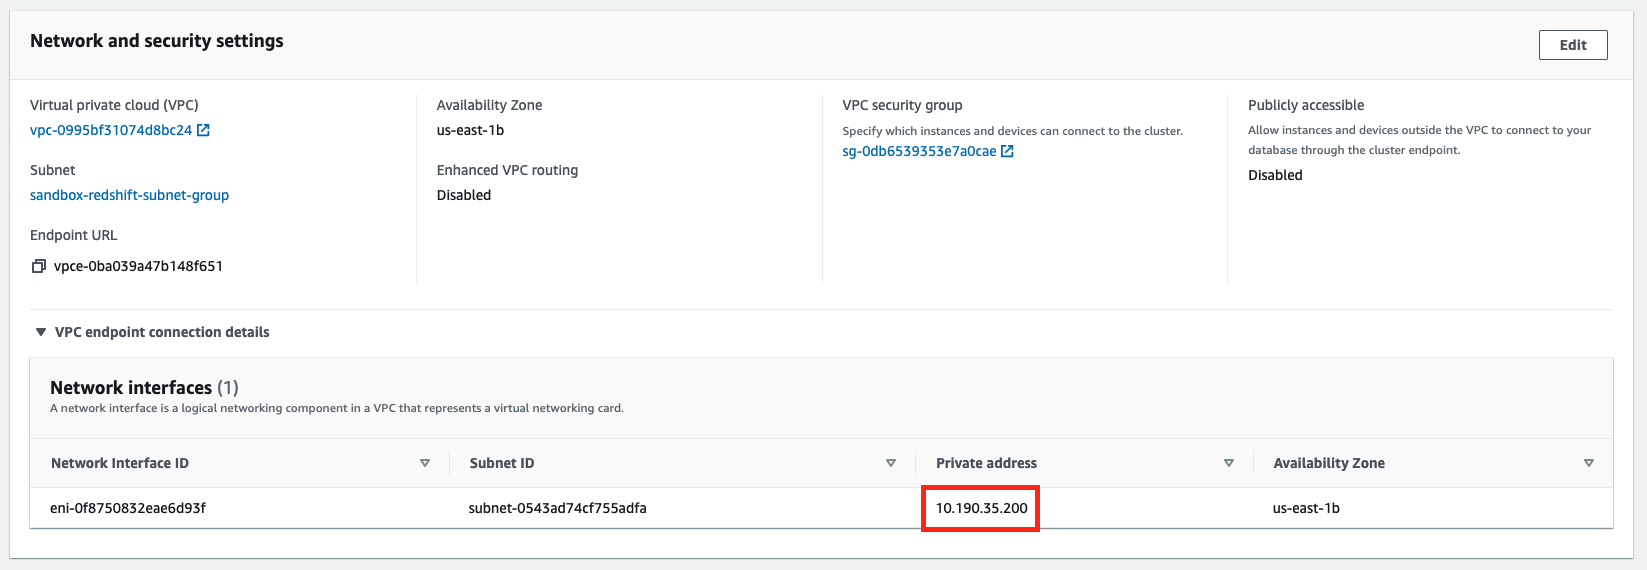
- Use IP addresses from the Redshift cluster’s Network Interfaces whenever possible. While IPs listed in the Node IP addresses section will work, they are also more likely to change.
- There will likely be only one Network Interface (NI) to start, but if the cluster fails over to another availability zone (AZ), a new NI will also be created for that AZ. The NI IP from the original AZ will still work, but the new NI IP can also be added to the Target Group. If adding additional IPs, note that the NLB will also need to add the corresponding AZ. Once created, the NI(s) should stay the same (This is our observation from testing, but AWS does not officially document it).
-
Redshift Serverless
- To find the IP addresses for Redshift Serverless instance locate and copy the endpoint (only the URL listed before the port) in the Workgroup configuration section of the AWS console for the instance.
- From a command line run the command
nslookup <endpoint>using the endpoint found in the previous step and use the associated IP(s) for the Target Group.
-
-
Target Group protocol: TCP
-
-
Network Load Balancer (NLB) — Requires creating a Listener that attaches to the newly created Target Group for port
5439 -
VPC Endpoint Service — Attach to the newly created NLB.
- Acceptance required (optional) — Requires you to accept our connection request after dbt creates the endpoint.
2. Grant dbt AWS Account access to the VPC Endpoint Service
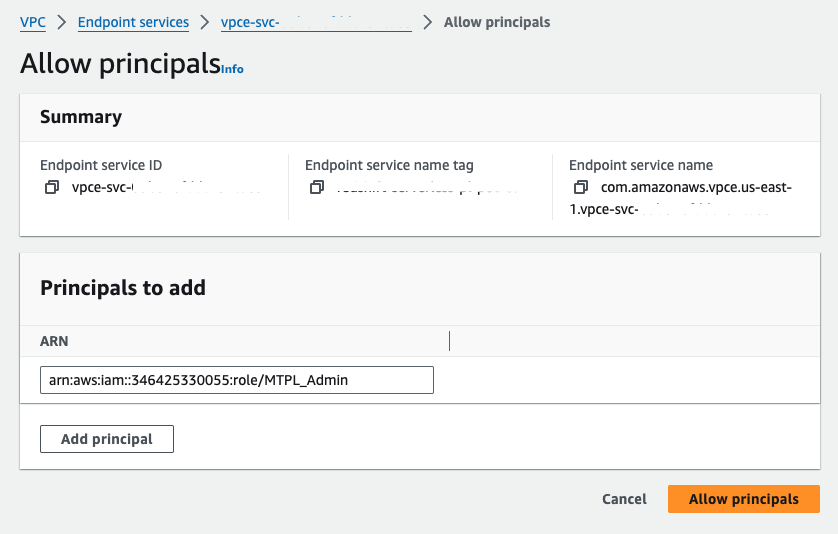
On the provisioned VPC endpoint service, click the Allow principals tab. Click Allow principals to grant access. Enter the ARN of the root user in the appropriate production AWS account and save your changes.
- Principal:
arn:aws:iam::346425330055:role/MTPL_Admin
3. Obtain VPC Endpoint Service Name
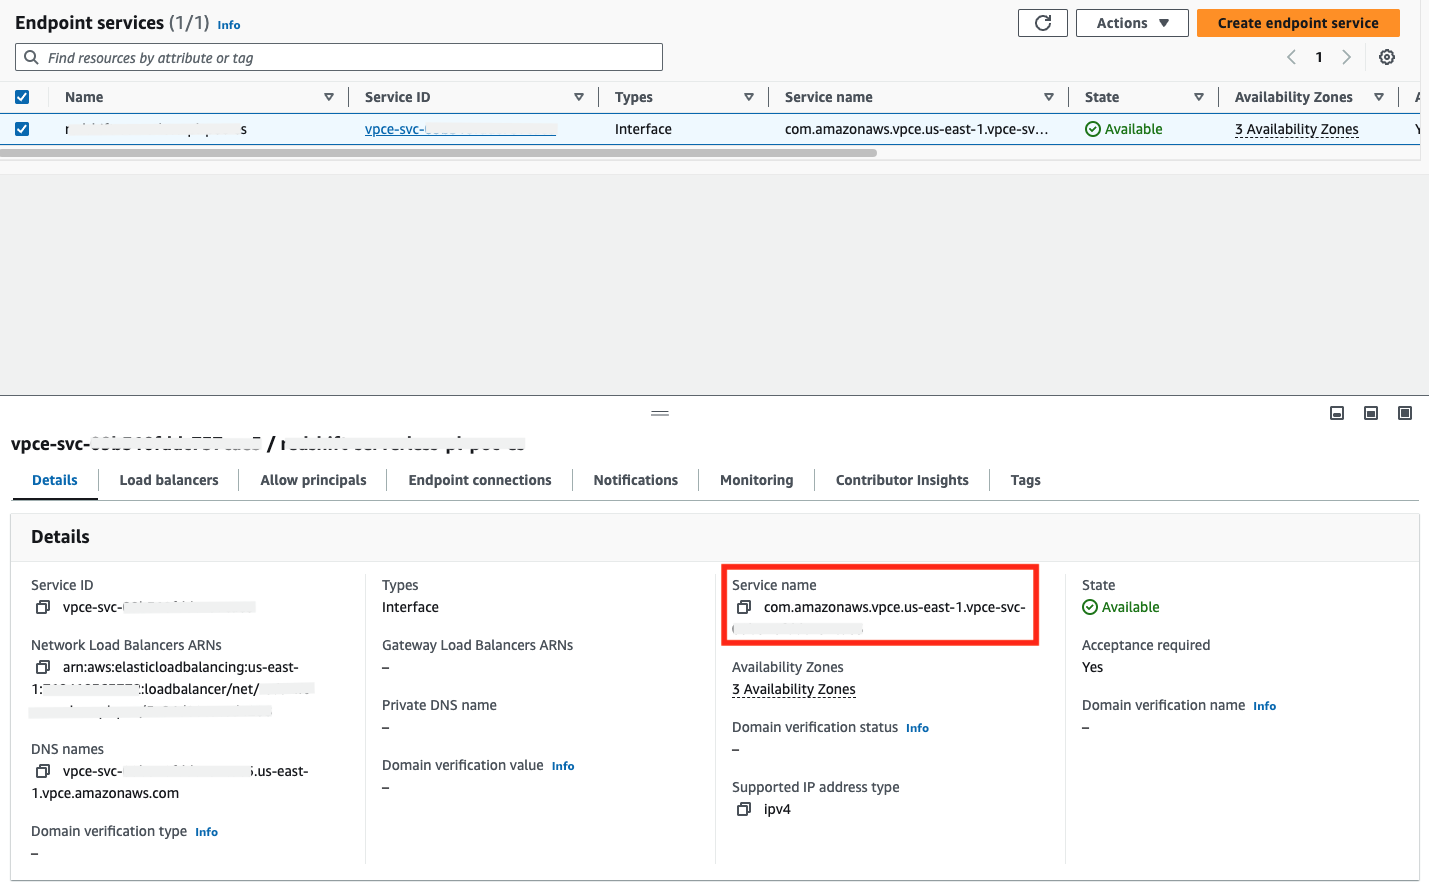
Once the VPC Endpoint Service is provisioned, you can find the service name in the AWS console by navigating to VPC → Endpoint Services and selecting the appropriate endpoint service. You can copy the service name field value and include it in your communication to dbt Cloud support.
4. Add the required information to the template below, and submit your request to dbt Support:
Subject: New Multi-Tenant PrivateLink Request
- Type: Redshift Interface-type
- VPC Endpoint Service Name:
- Redshift cluster AWS Region (e.g., us-east-1, eu-west-2):
- dbt Cloud multi-tenant environment (US, EMEA, AU):
dbt Labs will work on your behalf to complete the PrivateLink setup. Please allow 3-5 business days for this process to complete. Support will contact you when the endpoint is available.
Create Connection in dbt Cloud
Once dbt Cloud support completes the configuration, you can start creating new connections using PrivateLink.
- Navigate to settings → Create new project → select Redshift
- You will see two radio buttons: Public and Private. Select Private.
- Select the private endpoint from the dropdown (this will automatically populate the hostname/account field).
- Configure the remaining data platform details.
- Test your connection and save it.


